Simple Summer Top


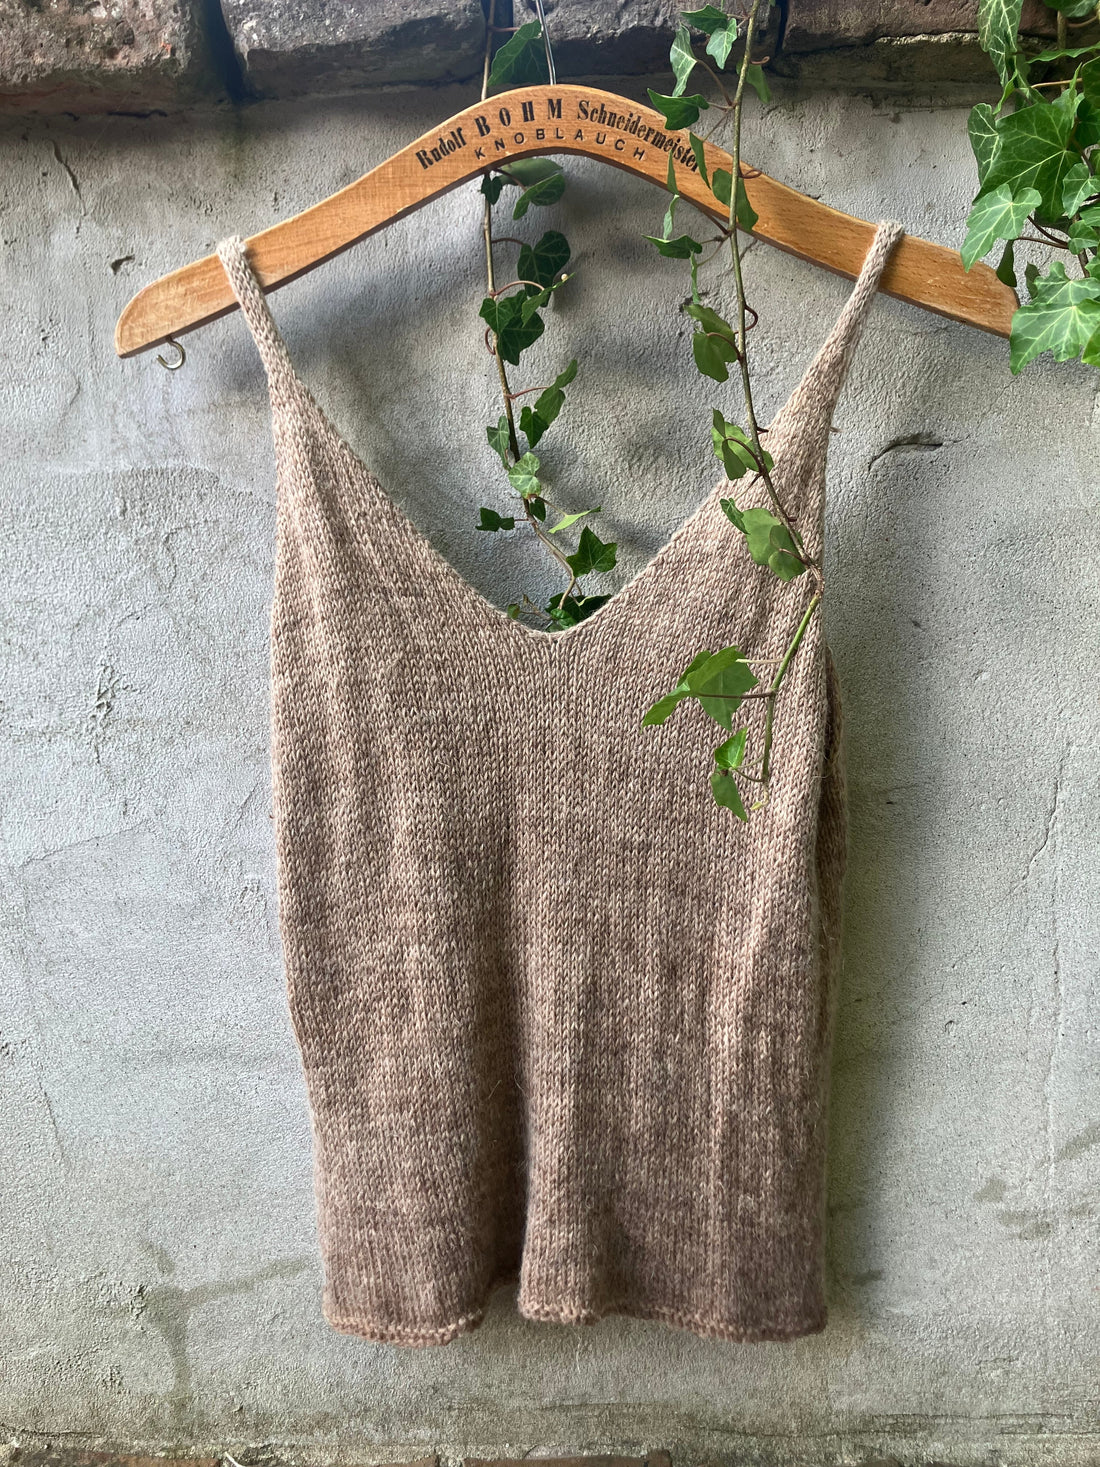
In the summertime I usually crave for a simple summer top that doesn’t require a lot of yarn - so I can easily bring it everywhere. Something easy enough to knit while having a conversation with a friend in the park, or on a terrace drinking some ice cold lemonade... This year I decided to share my recipe with you. I wrote the pattern down in just one size (the one I am wearing on the photo), but you can easily customise it. I added some help in the pattern to do so - and who knows, maybe next year I will find time to write it down in more sizes! If you want to start with the pattern, scroll down!
SUGGESTIONS FOR CUSTOMISING:
If you would like to work with a different size, first make a swatch. I recommend doing a bigger one with around 30 stitches, this way your measurements will be more accurate. Always wash and dry your swatch: some yarns change a lot afterwards.
Count the number of stitches that you have on 10 cm and divide them by 10 = a (the number of stitches that you have in 1 cm)
Now get your favourite top and measure it’s circumference =b
a x b = almost the number of stitches you are going to cast on
Now the very a last step: the number of your stitches to begin with must be an EVEN NUMBER and must be DIVISIBLE BY 4 (without a remainder) If your original number doesn’t meet these two expectations, then search the closest number to it which does. You are going to cast on this number of stitches.
(For example:
on your swatch you have 20 stitches on 10 cm
20/10=2 stitches on 1 cm
your favourite top’s circumference: 121 cm
121x2=242
242 is not divisible by 4 without a remainder, but 240 is. So you should cast on 240 stitches)
GENERAL WARNINGS
This design is the simplest top you can imagine, which means that it doesn’t have any special tailoring: the front and the back are divided in two equal halves and there is no tailoring on the cups either: they are simple triangles. It’s a pattern that works well with my measurements, but I am unsure if it works well with bigger cup sizes, because maybe in that case you would want to make it narrower at the body part and wider at the bust. In case of narrow back+bigger cup size it would be better not to divide it half-half but leaving less stitches for the back and more for the front… So that is the part that I am not confident about. Still you can use this pattern to start your own adventure to design a top that fits you perfectly.
Instructions for customised sizes are added in cursive to the pattern.
PATTERN
Needles: 4 mm
Yarn: 100-200 gr fingering weight yarn (I used Familia con linho from roll up the sheep, 25% linen 75% wool 100g/430m and my sample weights 83 grs)
Gauge: 24 sts and 32 rows on 10 cm
Bust circumference of the final piece: 75 cm which is 15 cm negative ease for me
With your preferred method cast on 180 sts (or the number of sts you have counted with the help from instructions for customising above)
Rows 1-4: knitting flat, with half size smaller needles and knit in garter stitch (=row1:knit row2:knit)
Join the knitting in the round, careful not to twist your work and place a marker at the beginning of the round (BOR)
Or you can choose whatever pattern you wish to have at the bottom of your top: you can begin to work in the round immediately and make a ribbing of your liking…
Now knit in the round in stockinette stitch until your work measures 25 cm or the length you want to have, measuring from the underarm.
From here we are going to separate the front and the back and work flat.
We will start working with the first 90 sts, put the other 90 sts on hold and remove BOR. First we do some decreases for the underarm on both sides of the front and later we start decreases for the neckline in the middle, because I prefer to have the neckline less deep than the underarm.
If you work with different number of stitches, just divide them in 2 equal parts: one half will be the front and the other half will be the back.
Front:
Row 1 (RS): ssk knit until the last 2 sts k2tog turn work (2 sts decreased)
Row 2 (WS): purl
Repeat these 2 rows 3 more times (8 sts decreased = 82 sts in total)
Place a marker in the middle of the front stitches so that you have 41-41 sts ( or equal number of stitches ) on each side of the marker. First we are going to work with the stitches on the right side of the work:
Row 1 (RS): ssk knit until the last 2 sts before the marker k2tog turn work
Row 2 (WS): purl
Repeat these 2 rows until you have 7 sts. Leaving a long tail (around 50 cm) cut yarn and put the sts on hold.
You can adjust the width of your strap to your liking by leaving more or less stitches on your needles. In my case we will make a 7 sts wide strap.
We are going to work on the remaining sts on the left side of the front:
Join yarn, and beginning on the right side, at the middle of your work, where the marker is-if you still have it:
Row 1 (RS): ssk knit until the last 2 sts k2tog turn work
Row 2 (WS): purl
Repeat these 2 rows until you have 7 sts. Leaving a long tail (around 50 cm) cut yarn and put the sts on hold.
Back:
Place a marker in the middle of the back stitches so that you have 45-45 sts (or equal number of stitches) on each side of the marker. First we are going to work with the stitches on the right side:
Join yarn
Row 1 (RS): ssk knit until 2 sts before the marker k2tog turn work
Row 2 (WS): p2tog purl until 2 sts before the marker p2tog turn work
Repeat these 2 rows until you have 7 sts on your needles. Leaving approx 20 tail cut yarn and put sts on hold
Join yarn to your remaining back sts, we are going to start to work on the right side, at the middle of the back:
Row 1 (RS): ssk knit until 2 sts before the marker k2tog turn work
Row 2 (WS): p2tog purl until 2 sts before the marker p2tog turn work
Repeat these 2 rows until you have 7 sts on your needles. Don’t cut your yarn yet.
Now we are going to make the straps of the top. We start to make the straps of the front first, where we have left a long tail of yarn with which we can work.
Row 1 (WS): purl
Row 2 (RS): knit
Repeat these 2 rows until a) you run out of yarn b) you reached the desired strap length
We are going to repeat the same with the other front strap and then we sew together the front and back straps with kitchener stitch. If you run out of yarn before you reach the desired length, knit some rows on the back straps too, or join yarn.
Again this is a place for your creativity: You can work the straps using a cable pattern, or making an i-cord. You can cross the straps if you prefer an X on the back etc…
Abbreviations:
St/sts - stitch / stitches
Ssk - slip slip knit
K2tog - knit 2 together
RS - right side of your work
WS - wrong side of your work
I hope that you enjoyed knitting this pattern and I hope that you are satisfied with the outcome. Please share your projects with me, using @atelierooi or #atelierooi
And feel free to send me your feedback to: info.atelierooi@gmail.com

